Adding the Device
This tutorial applies to Linux machines since Windows includes a desktop GUI. It is geared towards those familiar with the command line. Our Getting Started Guide is a good resource for setting up a device from the device itself.
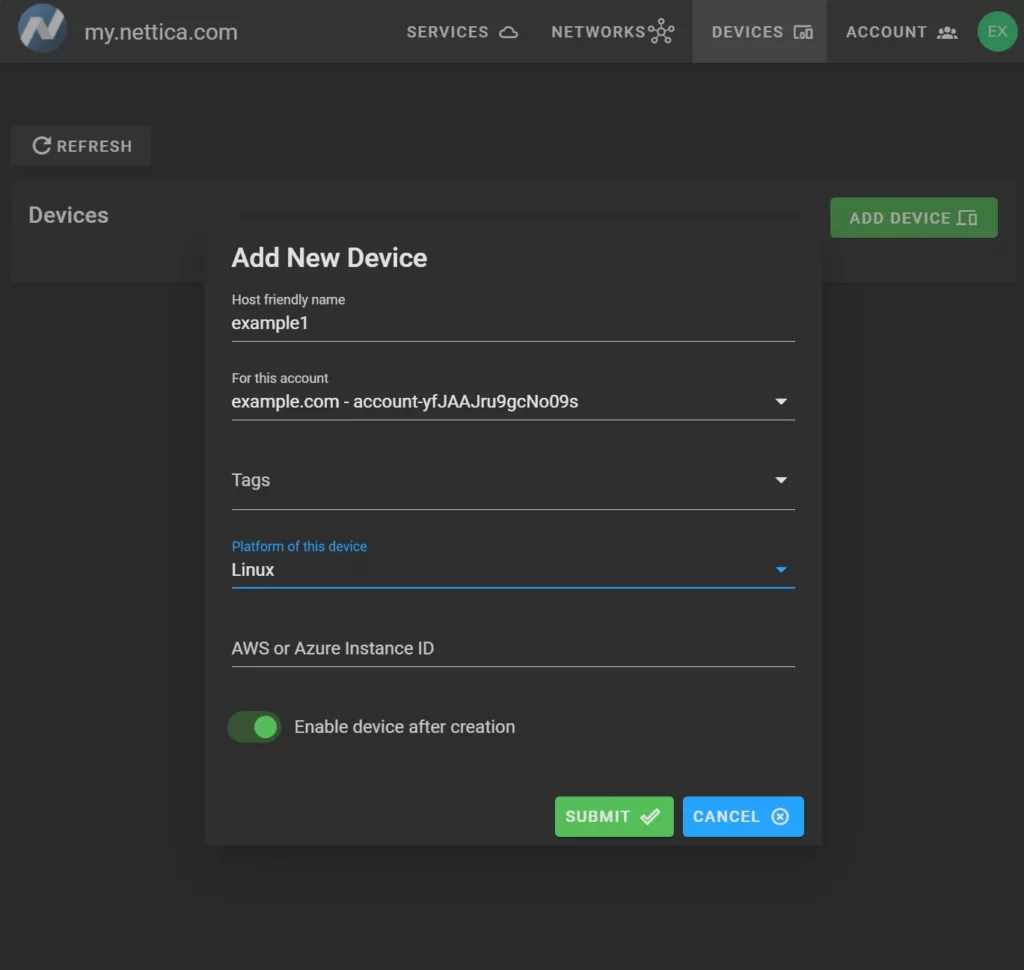
To begin, log in to the Nettica Admin, click on the “Devices” tab, and then click “Add Device”:

Fill in a friendly name for the device, and click “Submit”.
If the device you are adding is a cloud-based VM with AWS or Oracle, then be sure to add the Instance ID for the machine. This will allow for automatic configuration of the Agent. This is also available in Azure, but accessing the Instance ID is more difficult so you should follow the instructions below.
Configuring the Agent
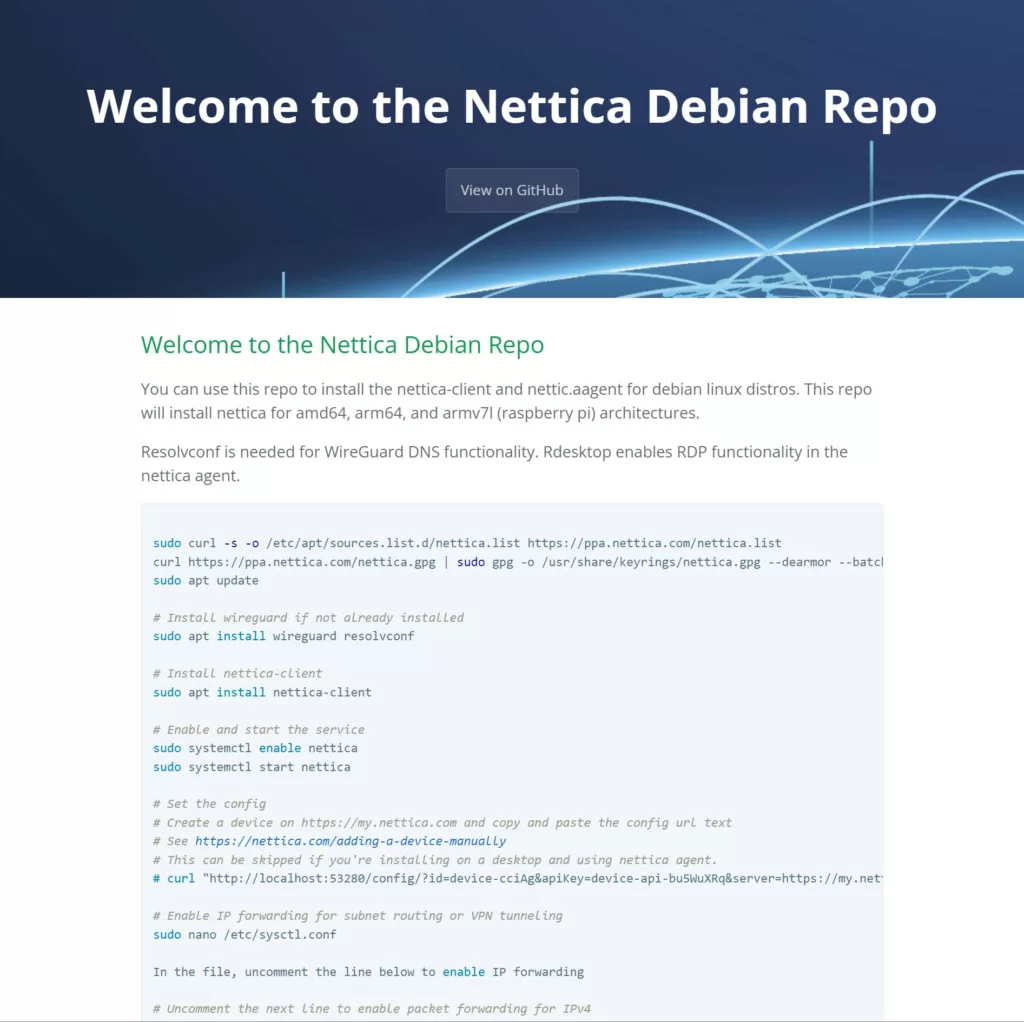
When you are ready to install the Linux agent, visit https://ppa.nettica.com and follow the instructions. For RPM-based Linux distributions, visit https://rpm.nettica.com.

After installing the Agent, if you included the Instance ID earlier, you can simply hit refresh a few times and you will see your new device turn green, which indicates successful configuration.
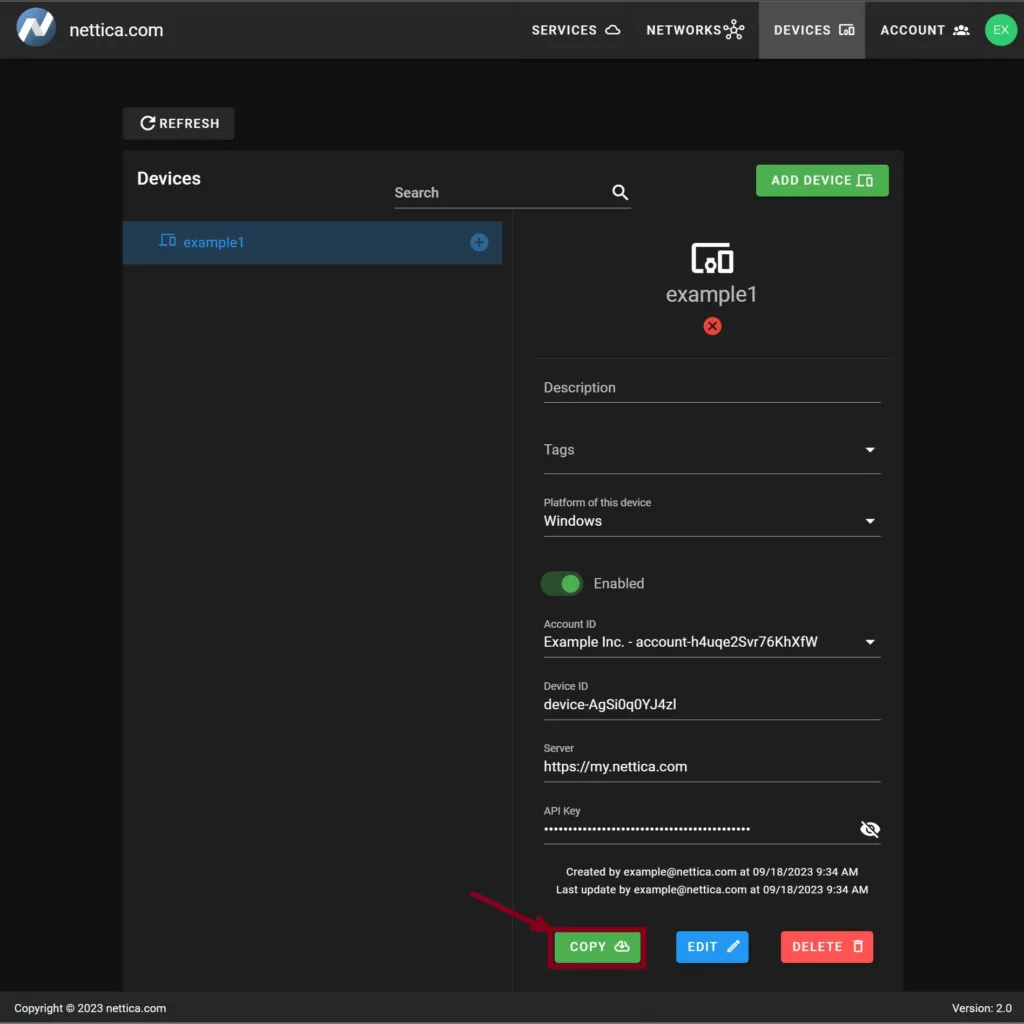
Otherwise, in the Nettica Admin, click on the device you just created, and click Copy in the right-hand pane:

This copies the configuration text to your clipboard. It is a curl command. Paste this into the terminal you are using to configure the server. The response will contain JSON, which means the device is now ready. Congratulations!
Conclusion
This tutorial taught us how to quickly and easily configure a Linux Server for the Nettica VPN Service. We learned how the Instance ID is invaluable for quickly configuring a device, as well as how to use the Admin to do it manually.
