Introduction
Our containerized services provide building blocks for your virtual private network. We make it easy to get the services you need without having to sign up with a cloud provider. Tunnel service provides an endpoint in the given region and all traffic is sent through the tunnel. Relay service is exactly the same, but only traffic destined for the given subnet is routed through the relay, not all traffic. This makes it easy to configure a relay to connect to hard-to-reach servers sitting behind a carrier-grade NAT. It also makes it easy to collaborate or build out automation.
Purchase
Premium and Professional customers automatically have relay and tunnel services enabled on their account. In addition, we’ve added a new “Relay Service” product to provide a lower-cost solution. After purchasing the service on this website, you can continue to the Nettica Admin to configure it.
Create Network
Click on the “Networks” tab in the Nettica Admin, and then click on the blue banner to automatically create your first network. You can review the network settings by clicking on it in the left-hand pane.
Setup
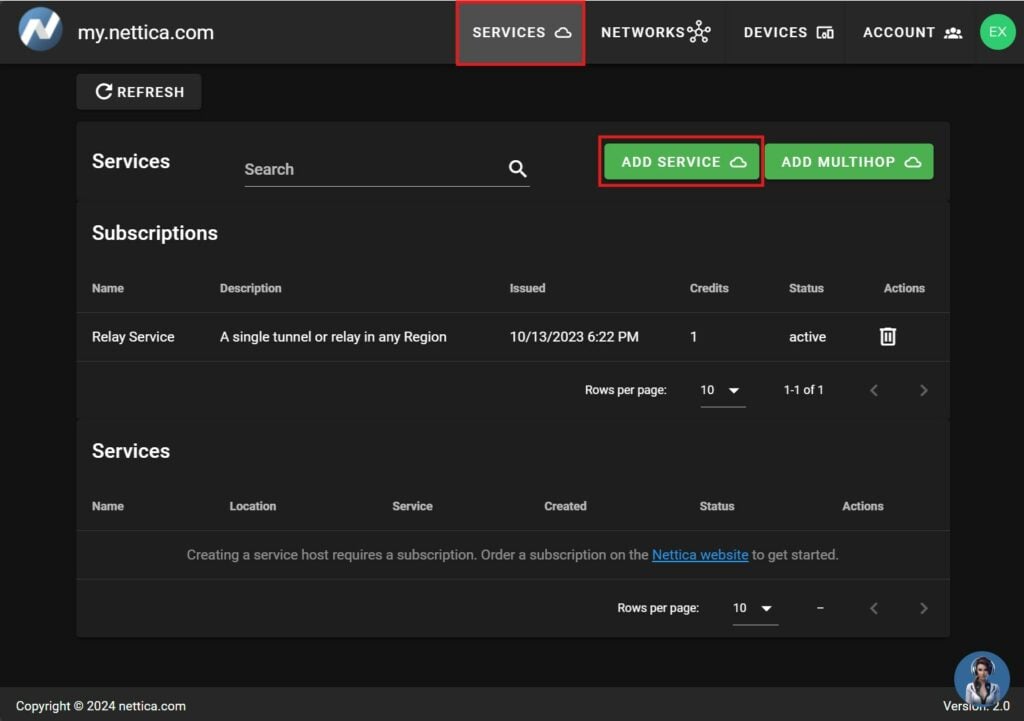
Next, click on the “Services” tab in the Nettica Admin and you’ll see your newly purchased subscription.

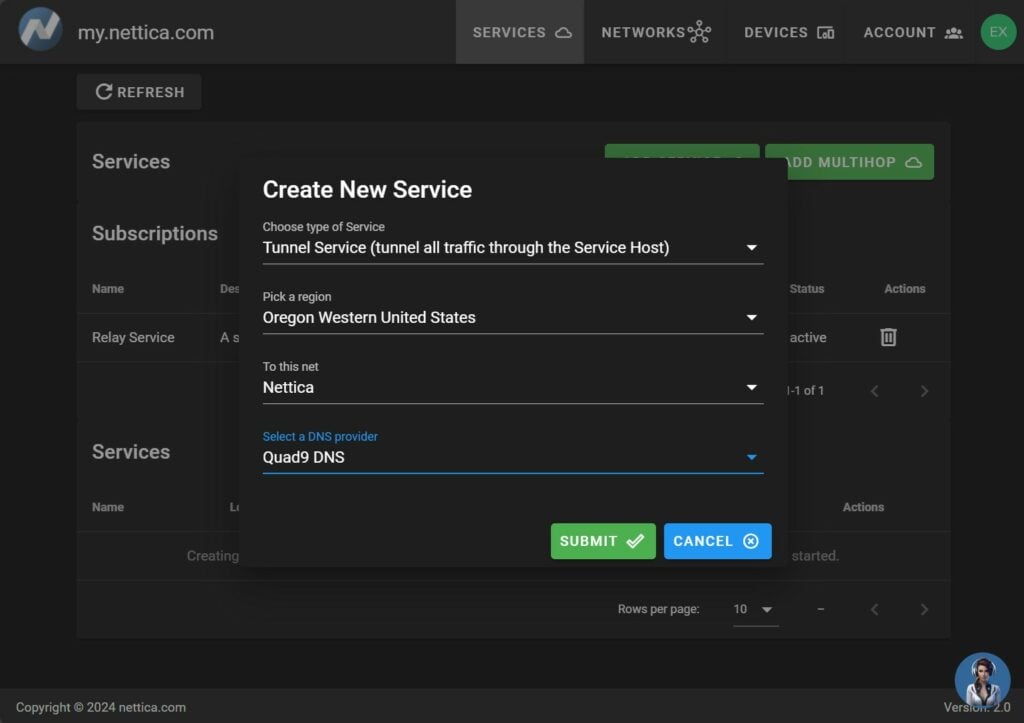
Click “Add Service” and then choose how and where you would like to configure the service.

Type of Service
- Tunnel: All traffic is sent through the service endpoint. The location can be anywhere in the world. We suggest a geographically close location for general browsing, but it is entirely up to you.
- Relay: Only traffic destined for the given subnet is tunneled through the endpoint. Relay service helps connect hard-to-reach locations, such as a home network behind a carrier-grade NAT. It also supports subnet routing.
Location
Choose from over 20 locations. For relay service, pick a location geographically close to minimize latency.
Network
You can select an existing network or elect to create a new one. In this example, we have chosen the Nettica network.
DNS Provider
Select a DNS provider. If you have chosen to add to an existing network, then only the tunnel/relay host itself will use this provider. The rest will use the DNS configured in the network settings. If you create a new network, then this is the default DNS configuration for the network.
Click “Submit” once you have completed the form. Service will begin immediately.
Next, download and install the Nettica Agent for Windows, or Debian and Fedora Linux.
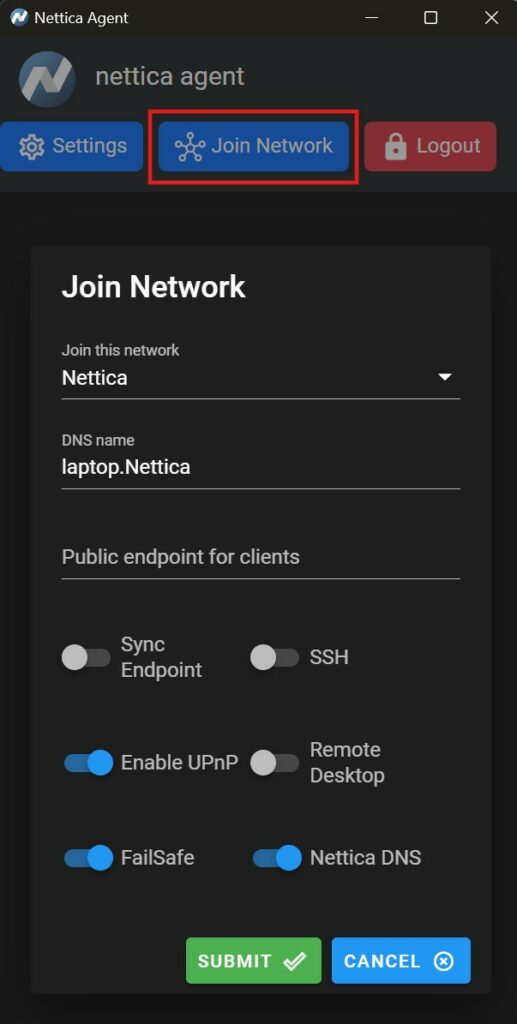
Once installed, log in, and click “Join Network”:

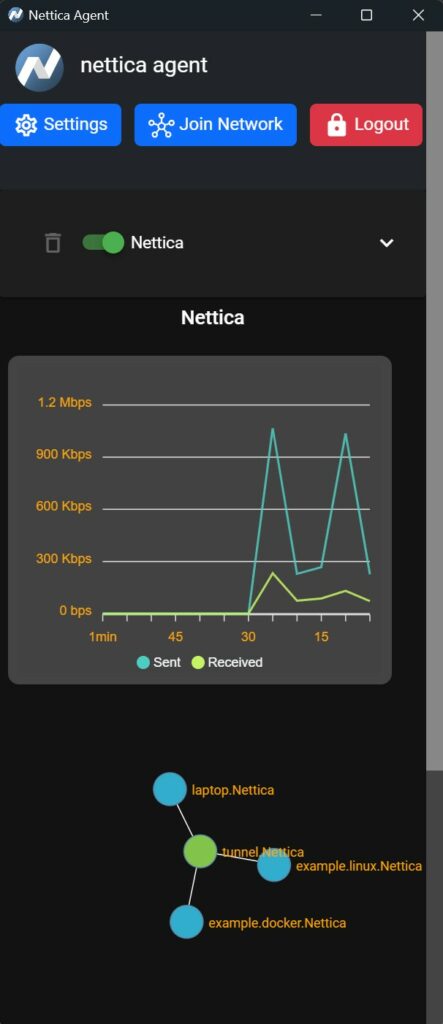
Pick a name for your host and join the “Nettica” network created earlier. Note that the public endpoint should be left empty in this scenario. After a few seconds, the network will install and immediately begin routing traffic through the service.

Congratulations, you have configured your tunnel service! Note that to disable routing through the service, use the switch in the Nettica Agent to disable it. Otherwise, it’s always on.
