In this tutorial, we’re going to launch a cloud instance and connect to it using the Nettica VPN Service. We will be using Amazon AWS in this example. The process is even easier on Azure. The key takeaways from this tutorial are that you can successfully configure your VPN without ever opening the SSH or RDP ports to the Internet. It is all securely managed through your Nettica VPN connection to the host.
Subscribe to the Image
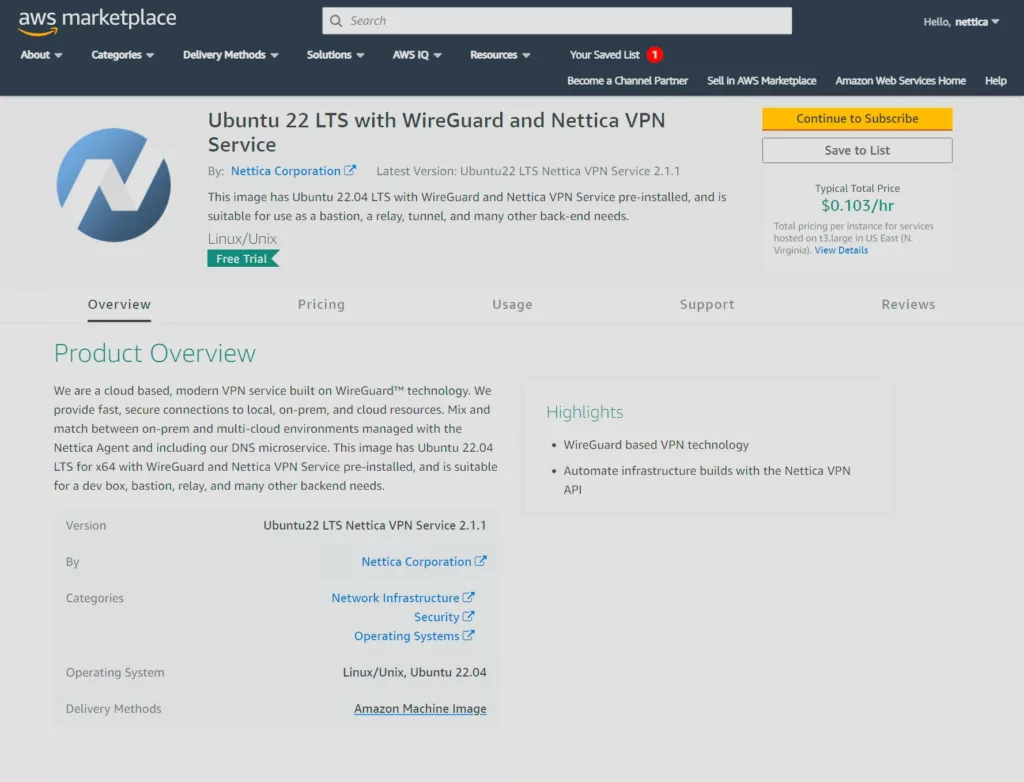
The first step is to subscribe to the image. Find the image you’d like to launch from the Cloud Services page. For this example, we’re choosing the Ubuntu 22 Desktop with WireGuard and Nettica VPN Service, and provisioning a t3.large.
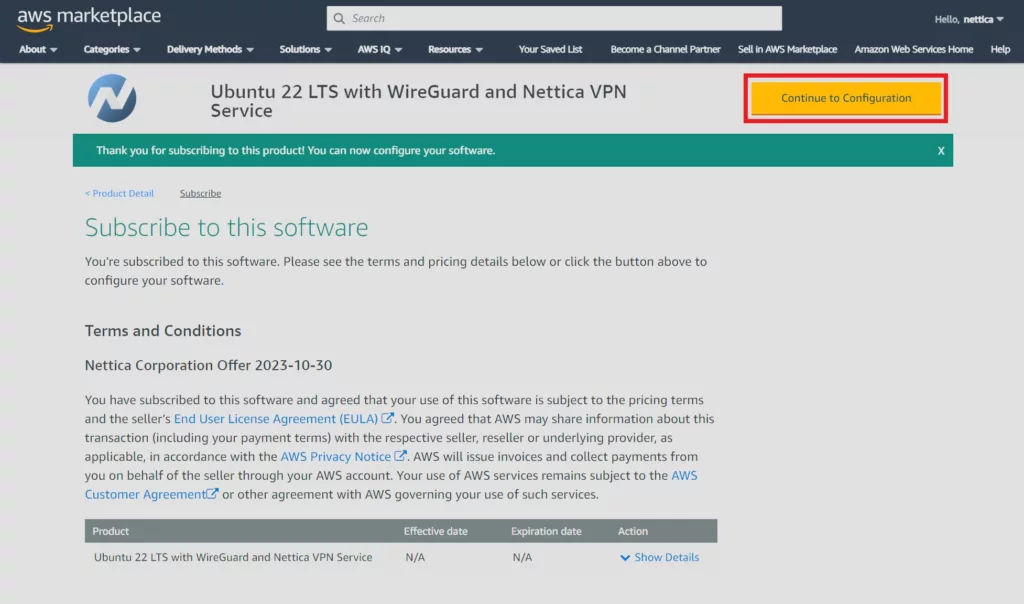
After subscribing continue to configuration:
And choose the location to launch the instance, among other things:
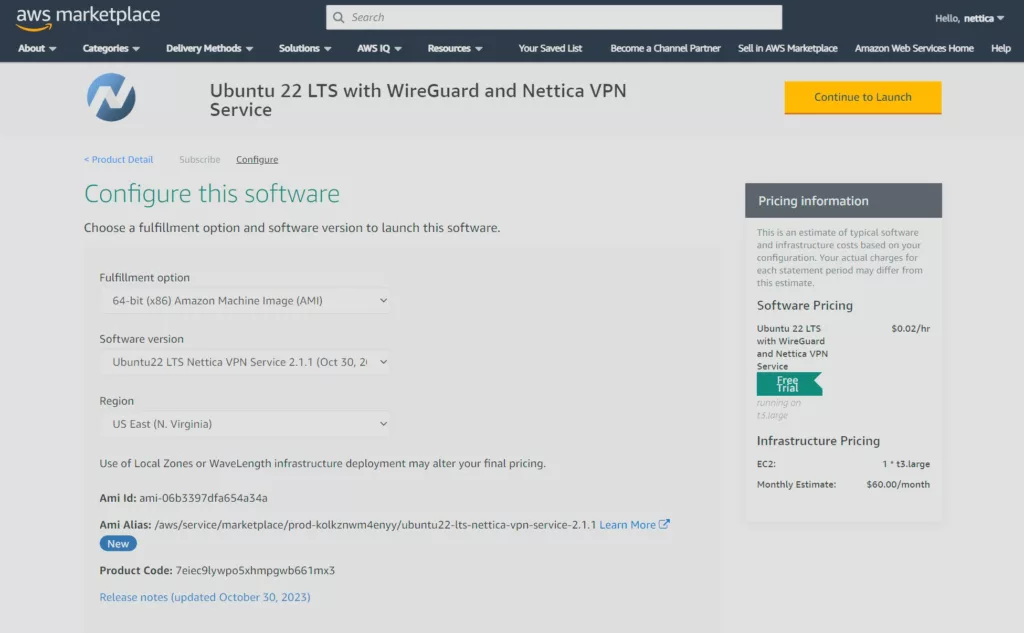
The region can be practically anywhere in the world, in case that is of interest.
Continue to Launch
After making your selections, click Continue to Launch. Be sure to have access to the key pair you use to launch the instance. Choose the pre-configured security group during the launch process. Note that only the WireGuard port is open and that the SSH and RDP ports are not present.
Create a Network
While waiting for the instance to launch, login to the Nettica Admin Console and create a new network by clicking on the NETWORKS tab and then clicking the Create button.
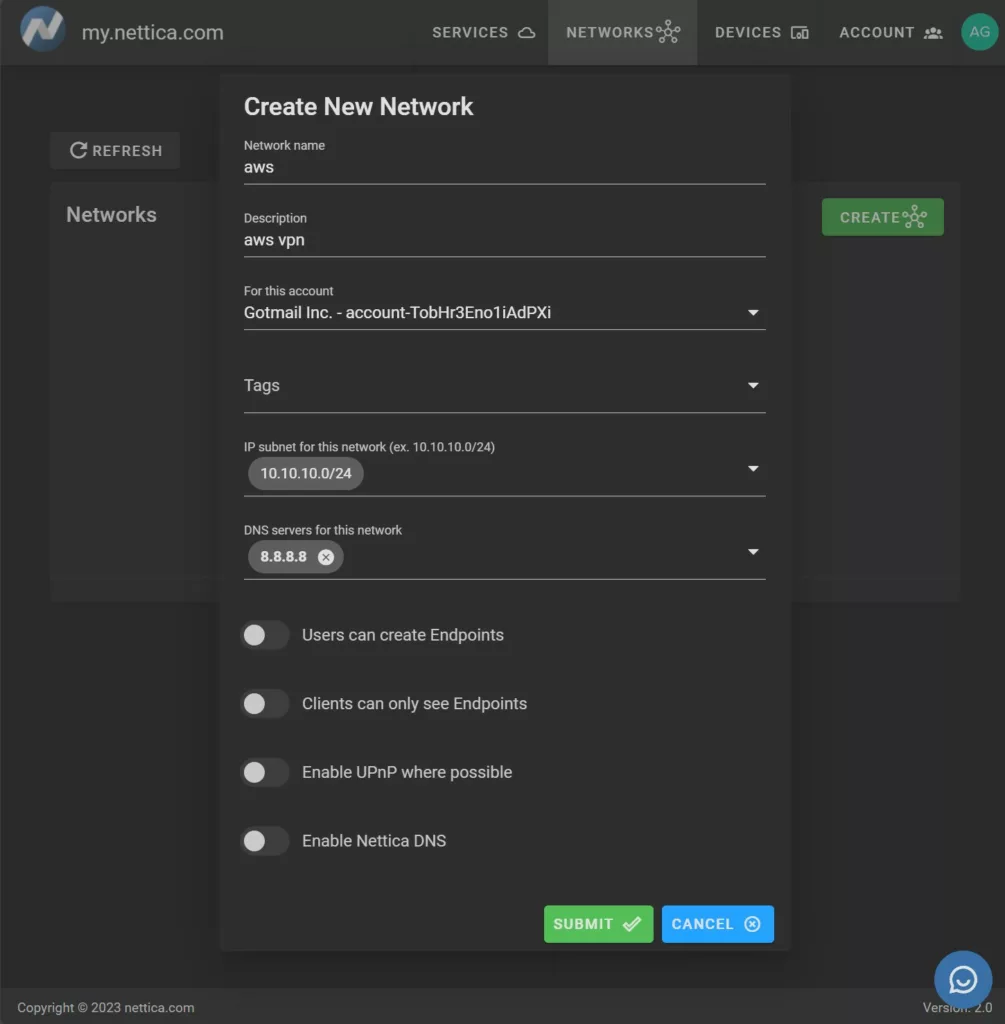
Specify “aws” for the name of the network, and “10.10.10.0/24” for the subnet. Click submit.
Add the Device
Next, add the device to your account. Click on DEVICES, ADD DEVICE:
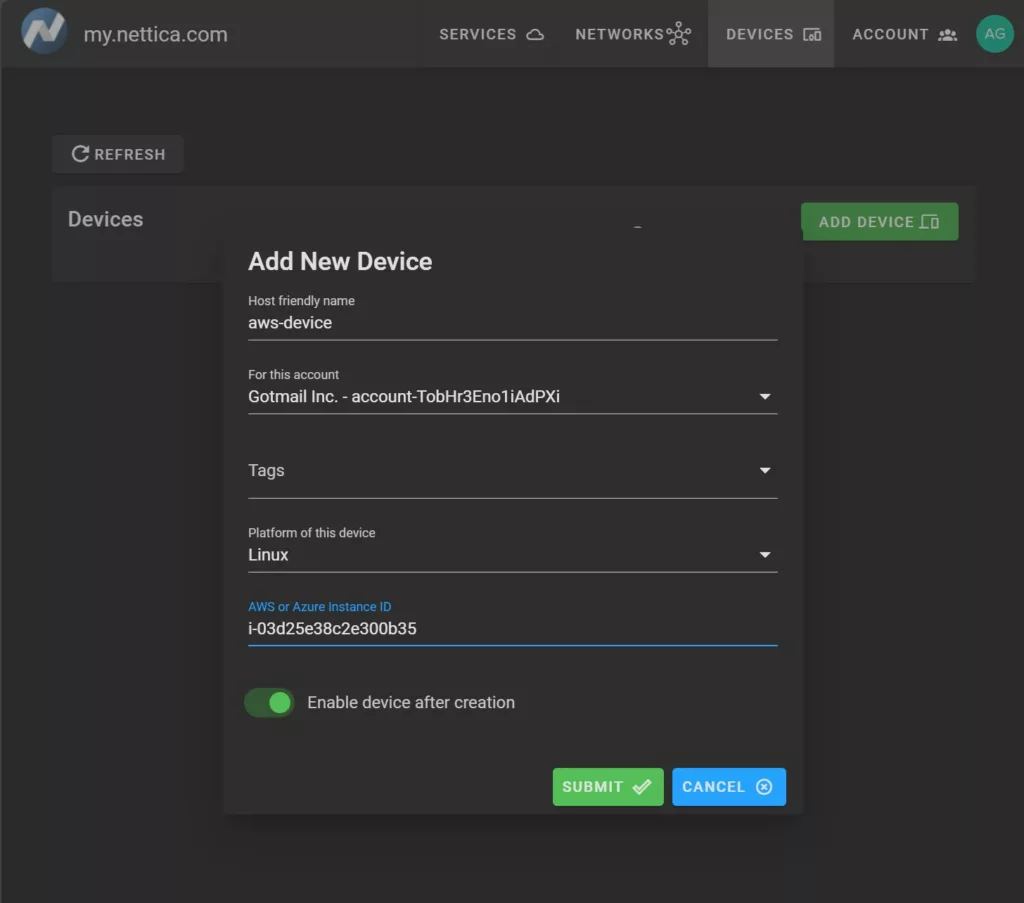
Be sure to enter the AWS instance ID. This will allow the system to auto-detect and add the device to your account without having to log in to it.
Add VPN
Add the device to your freshly created VPN. To do this click on the blue plus sign (“+”) next to your device:
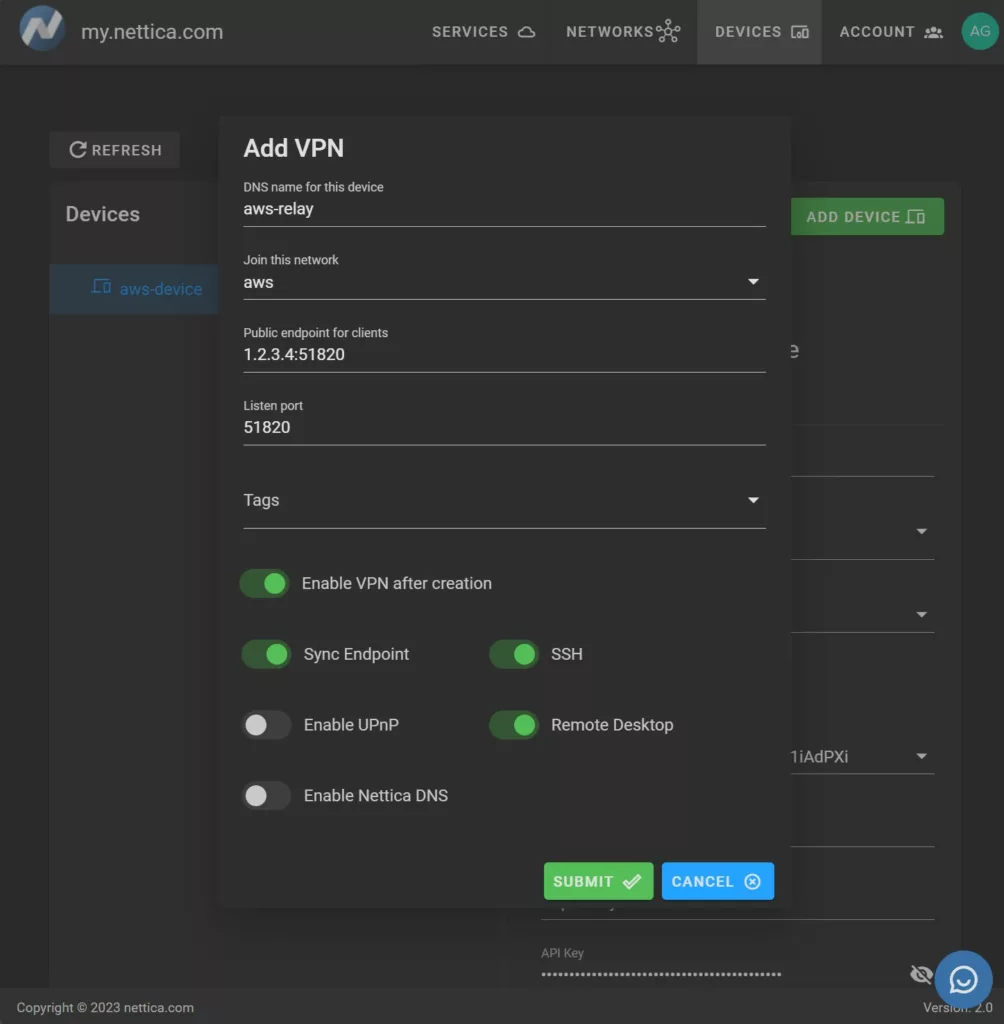
Name the device, join the “aws” network, specify 1.2.3.4:51820 and 51820 for the endpoint and port, and click “Sync Endpoint” to automatically pick up the correct external IP address. You can also enable SSH and Remote Desktop for the Nettica Agent.
You have now successfully configured the VM in AWS. Download and install the Nettica Agent to your local machine, log in using the same credentials you used originally, and click “Add Network”. Specify the “aws” network and click “Submit”. You now have access to the VM in AWS through your VPN.
SSH into machine
Connect via SSH by opening a terminal and entering ssh [email protected], or by clicking the SSH icon in the Nettica Agent on your local machine.
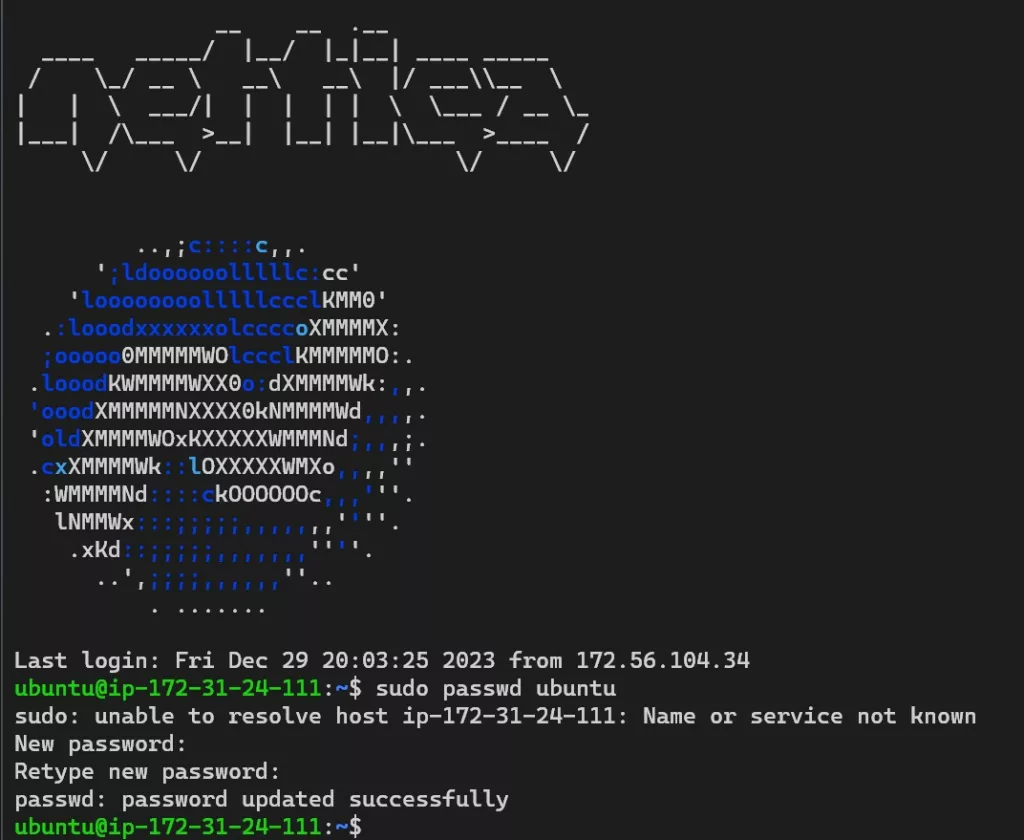
Enter the command above to change the default user’s password. You can also add additional users here if desired. You can log out when you’re done.
Launch Remote Desktop
Open Remote Desktop by typing “mstsc.exe” into the start menu of Windows. Enter 10.10.10.1 and click “Connect”. You can also click on the remote desktop icon in the Nettica Agent.
Enter “ubuntu” for the user and the password you just created. After a moment, the desktop will appear.
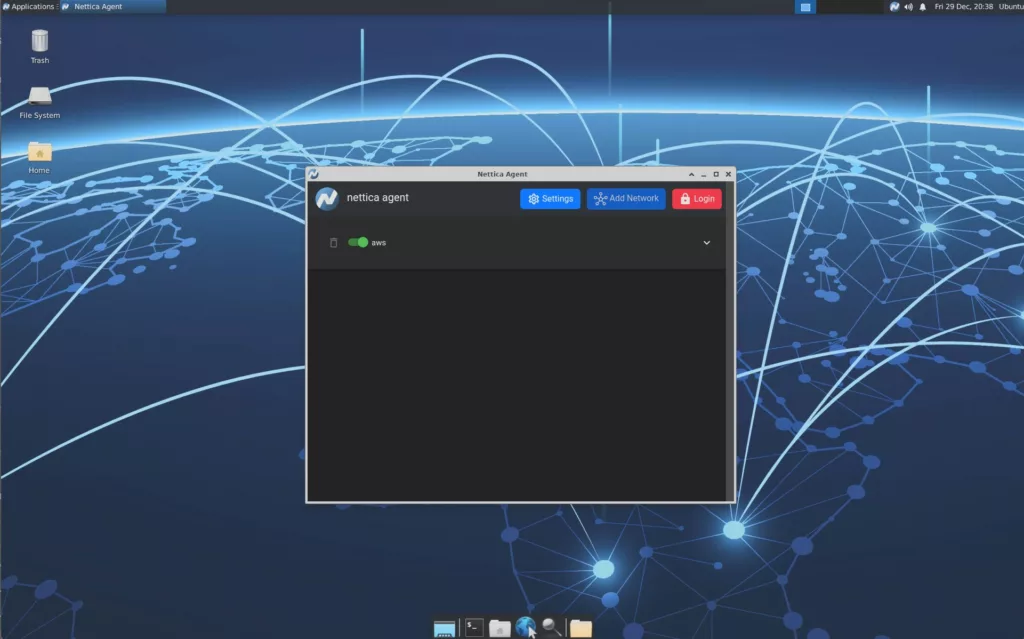
From the Applications menu, click “Internet” and then “Nettica Agent” to launch the Nettica Agent.
Conclusion
In this tutorial, we learned how to launch a cloud instance of the Nettica VPN Service in AWS. Without ever opening the SSH or RDP ports to the Internet, we securely configured and connected to the instance using WireGuard. From here you can continue configuring your VM, turning it into a relay for accessing all your resources in the AWS, connecting all your colleagues, or bridging your various cloud and local environments. It’s entirely up to you. Do not hesitate to contact support with any questions or if you run into any problems.
