
Introduction to Remote Desktop
One of Windows’s best features is its remote desktop functionality. Now called the “Windows App,” remote desktop allows you to access your Windows machine remotely. However, without a VPN, accessing your machine remotely has become a risky proposition.
In the early days of the Internet, it was no problem configuring your home PC to be accessible from anywhere. Enable it, open some ports on your router, and you were done. However, these days securely configuring remote desktop is more difficult. Bots are constantly probing for an open port 3389 (the port used by RDP), and chances are your ISP will automatically block the port when a bot has been detected, defeating the whole purpose of having the port open. Security bugs have also been discovered in RDP, which has made running RDP on an open port dangerous. A VPN solves the problem.
Nettica addresses these concerns and makes it once again safe to connect back to your home PC with remote desktop. Nettica allows you to create a lightweight, secure VPN connection to your home. And it’s free! Once you see how useful we are, you may be interested in one of our paid plans that really lets you take control of your network.
Why is using a VPN better? Good question! Not all VPNs are created equally. Nettica uses WireGuard, a secure UDP-based protocol. Traditional TCP-based VPNs have to respond when someone initiates a connection with them. With WireGuard, if the connection isn’t from someone with the right key, it doesn’t even respond, which keeps you safe. WireGuard is also the fastest and most secure VPN protocol available.
Enable Remote Desktop
To set up a remote desktop, you first need to enable it. On a Windows Pro machine, go to Settings, System, scroll to the right-hand pane, and then find and click on Remote Desktop.
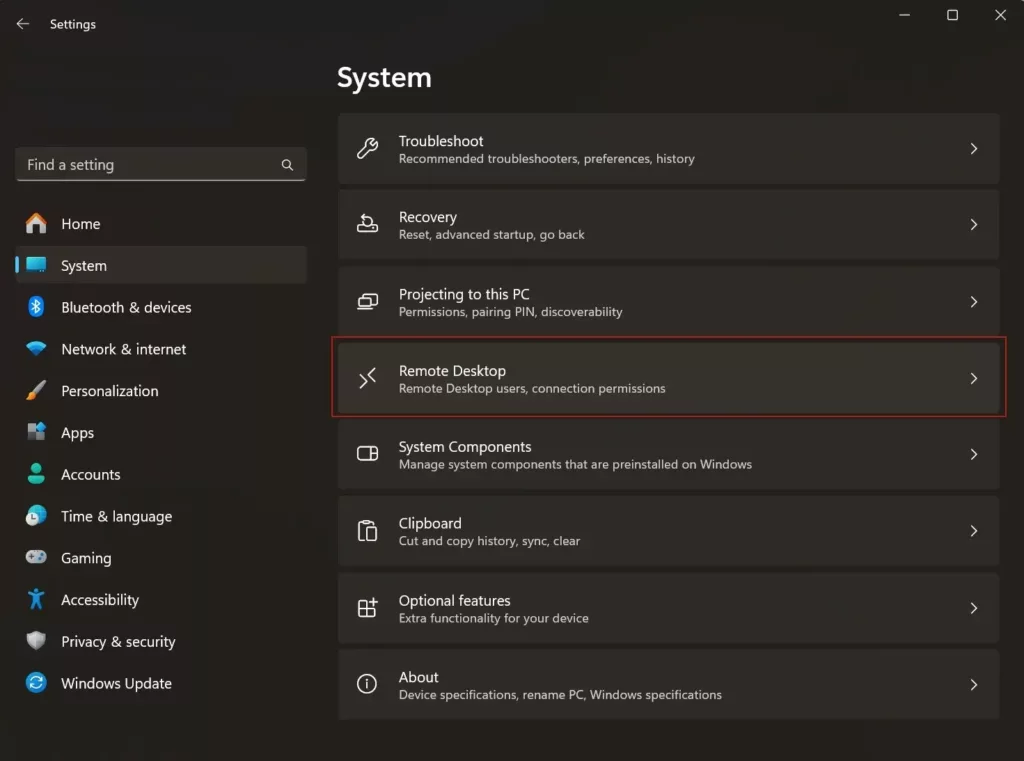
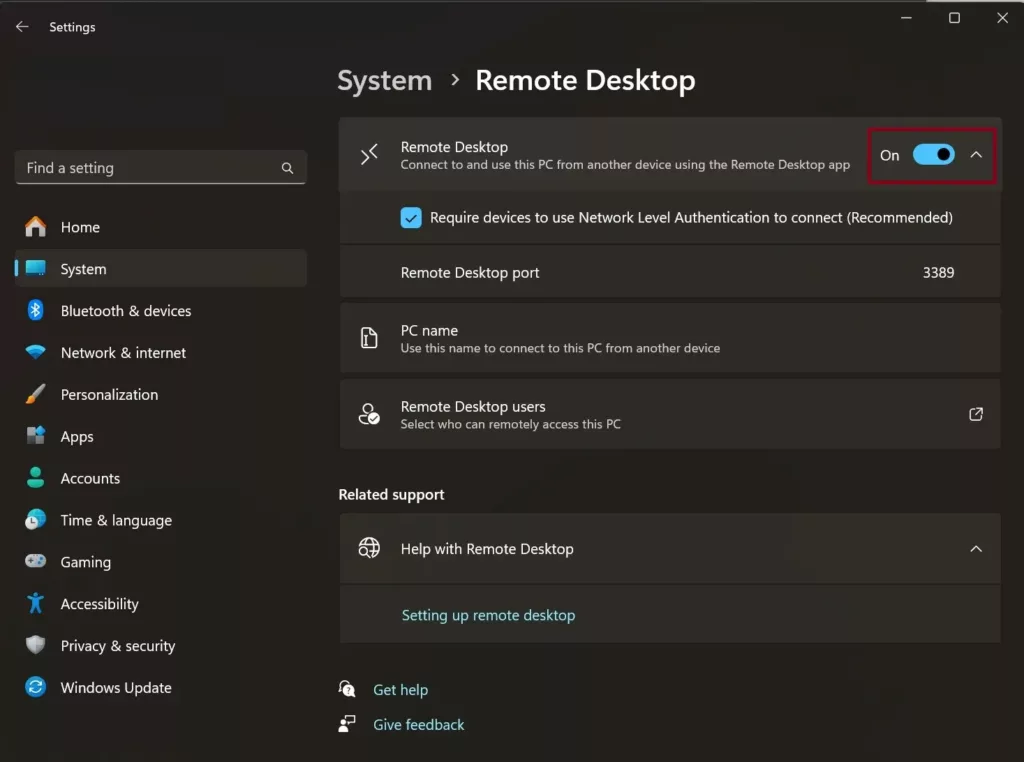
Toggle “Remote Desktop” using the switch. Now, it’s time to set up the VPN.
Create a Network
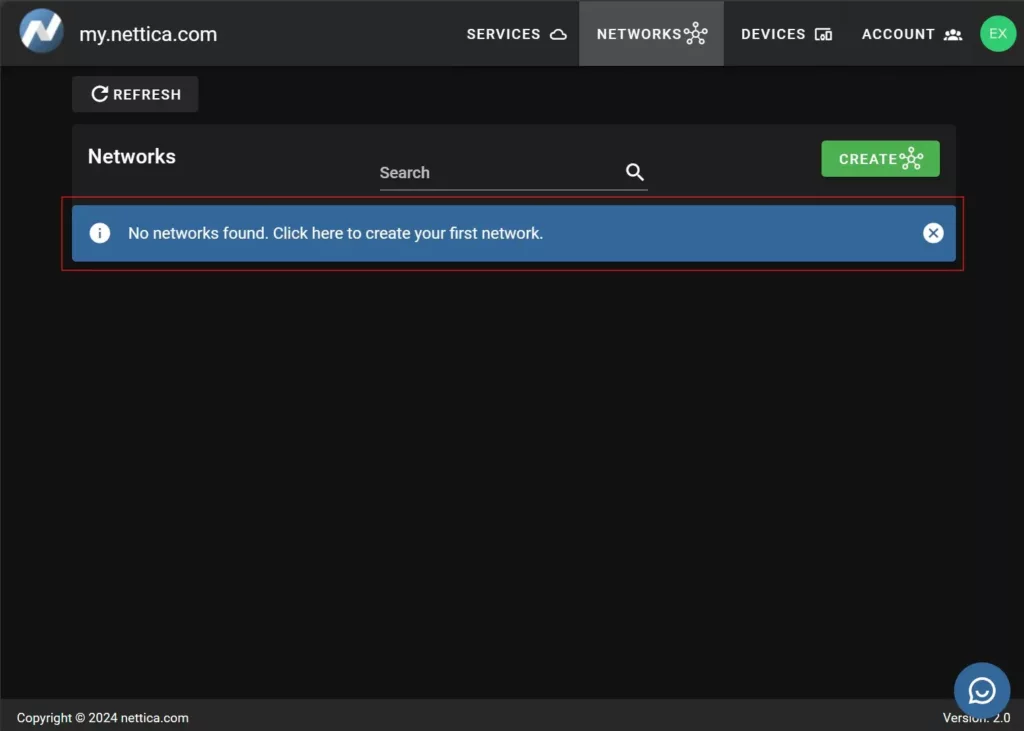
Login to the Nettica Admin. You can log in using your Google or Microsoft account rather than storing credentials with us. Managing your credentials is not our business. You can use your identity provider and get all their benefits, such as multi-factor authentication. After logging in, click on Networks, then click the blue banner. It will then automatically create your first network.
Add a Windows Host
After creating the network, let’s add your computer to it. To do this, download the Nettica Agent for Windows, then follow the instructions and install the client.
Launch the Nettica Agent and then click the Login button. A window will pop up to assist you with the login. Log in the same way you originally logged into the admin. After successful login, click “Join Network.”
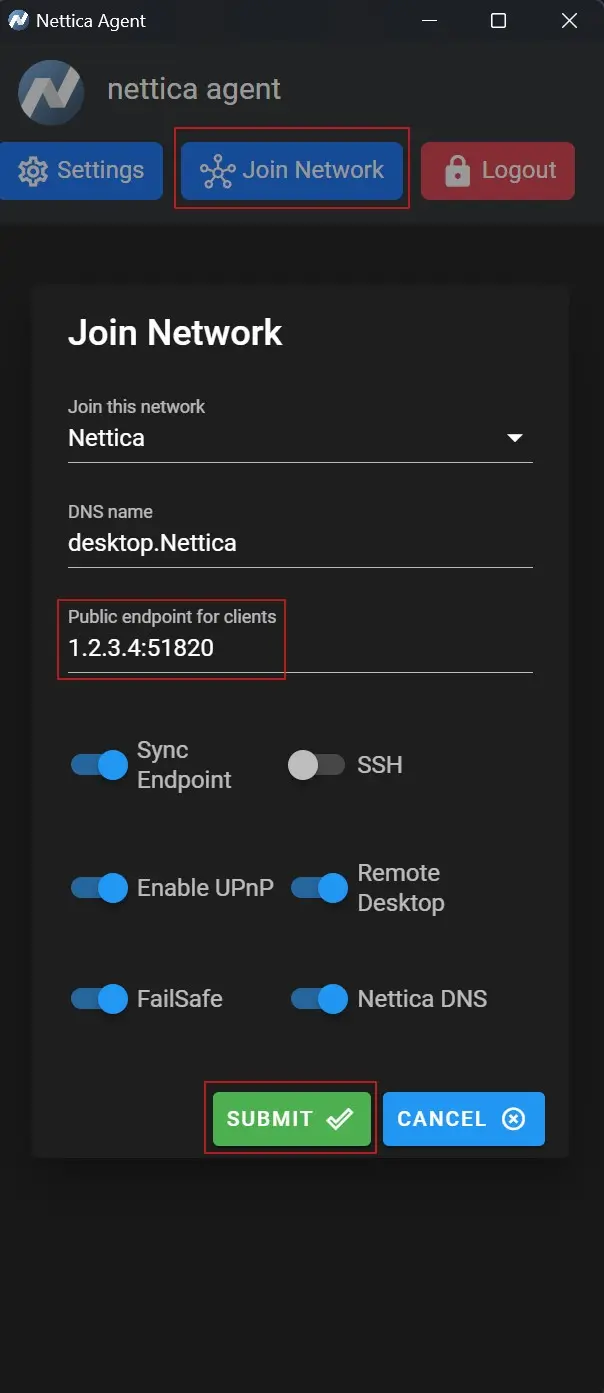
Enter the public IP address as shown above. Check the boxes for Sync Endpoint, UPnP, FailSafe (optional), Nettica DNS, and Remote Desktop, then click “Submit”. After a few seconds, the network will install, and you’ll receive a window notification. The endpoint IP address will update to your real external IP address with Sync Endpoint, and UPnP will open the port. The name of the machine, in the case “desktop.nettica”, is now registered with Nettica DNS. You’ll be able to use it from your laptop.
You have now successfully configured your home desktop to be securely accessible from the Internet. Repeat the process of installing the Nettica Agent and adding a Windows host for your laptop. It’s not necessary to specify the external IP address in this case. Now test your connection at a coffee shop. Enjoy!
Remote Desktop from the Coffee Shop
To start the remote desktop client on your laptop, in the search bar, enter “remote desktop” or “mstsc.exe” (Microsoft terminal services client) and you’ll find it.
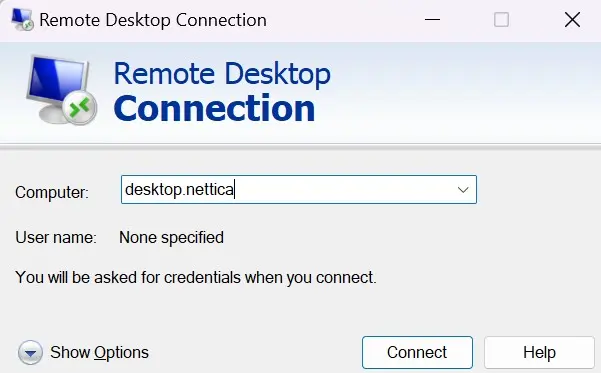
When starting remote desktop client on your laptop, use the VPN IP address (10.10.10.1 in this example) or the Nettica DNS name you assigned to it.
Troubleshooting
If you can’t connect to the machine, and it won’t even ping, then the likely culprit is the firewall. To disable the Windows firewall, type “firewall” into the Windows search bar and hit enter. Disable all the firewalls listed. If you find your connection then works, re-enable the firewalls. This needs to be done on your desktop, not your laptop.
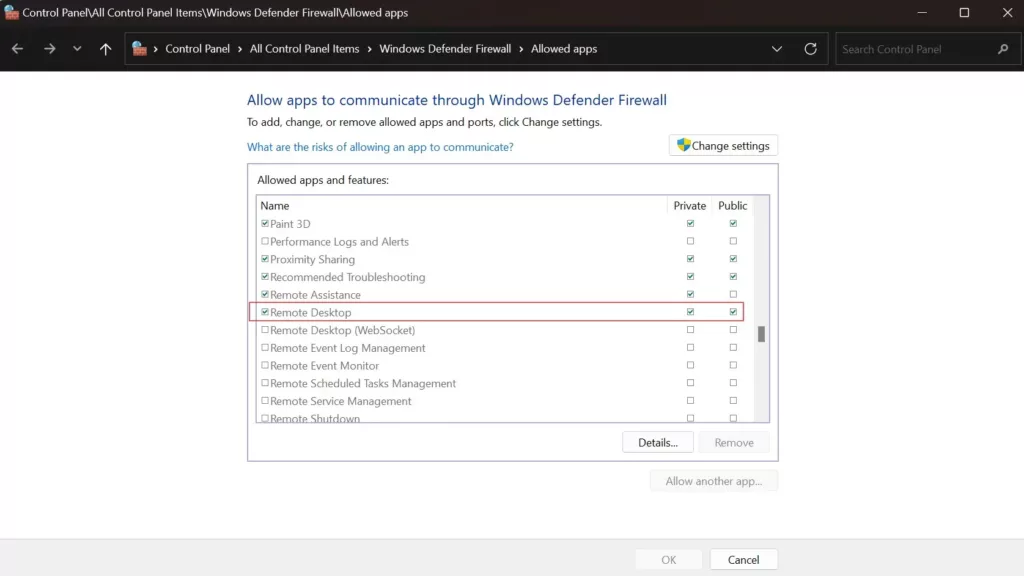
Type “firewall” into the search bar again, and this time select “Add an app through the Window Firewall.” Scroll down and find Remote Desktop, and allow it for both Private and Public connections. If you’re using another firewall product, consult with their documentation on how to allow apps or ports through. The RDP port is TCP 3389.
Related Services
If the above doesn’t work for you, then you’re probably behind a carrier-grade NAT. In that case, check out our relay services below, allowing you to connect regardless of your carrier or ISP. If you have any issues, contact our support team; they’ll be happy to help!
Nettica Relay and Tunnel Services
Related Reading
Use Docker & WSL2 to access your home network with WireGuard
Easily Create a VPN with a Raspberry PI and WireGuard
