Introduction
This quickstart can have you up and running with Nettica Tunnel Service in less than 10 minutes. If you’re looking for a service to mask your IP address and protect your Internet connection, look no further. Our templated configurations and Nettica EZ-Code make setup a breeze.
Why Nettica?
Why choose Nettica? For one, we offer more with our free service than most with their paid services. Besides securely browsing the web, you can connect back to your home, the cloud, or even with friends and family—all securely using the fastest VPN protocol available, WireGuard. We also provide some of the best US-based support you can find anywhere. We are committed to our customers.
Purchase Tunnel Service
To get started, purchase our Tunnel Service. Many options are available, including monthly, yearly, and buying with crypto. Choose what suits you best. Check out our Getting Started Guide if you’re just interested in seeing what’s available. Log in to our Admin and play around. You’ll be surprised at how easy it is to use.
Download Nettica Agent for Windows
The next step is to download and install the Nettica Agent for Windows. We will use it momentarily.
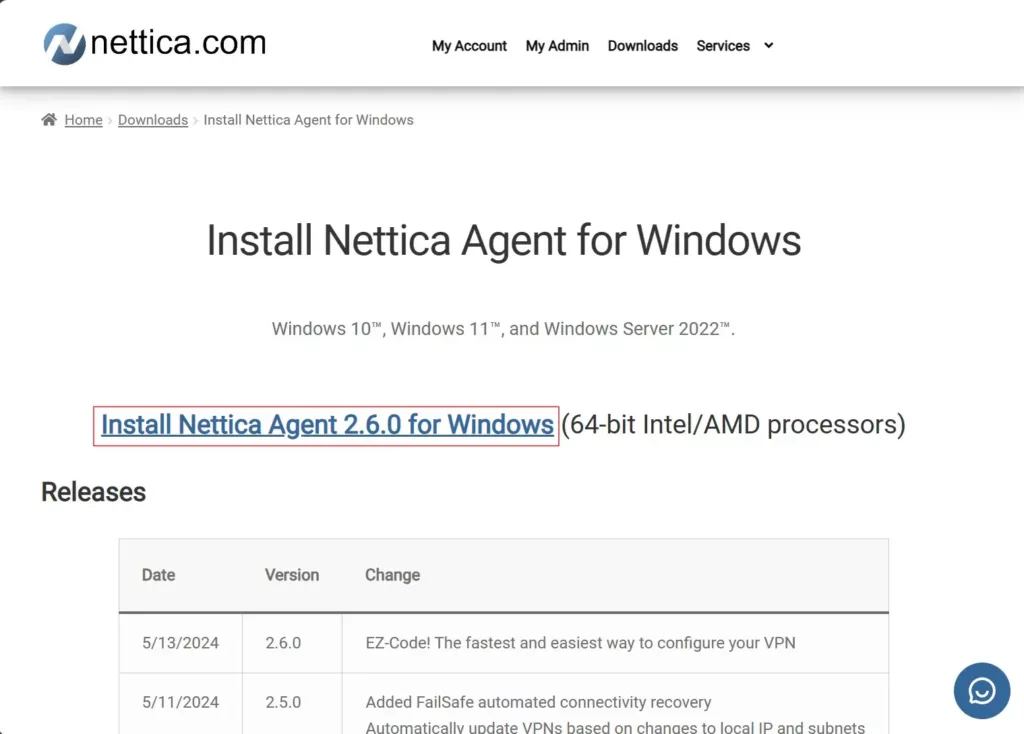
It should start automatically after installing it. Just leave it running as we go to the next step.
Configuration
After purchasing the service and downloading the agent, then it’s time to configure it. Log in to the Nettica Admin using the same credentials you used to buy the product.
Configure Network
Click on the Networks menu at the top of the page. You’ll see a blue banner to configure a new network.
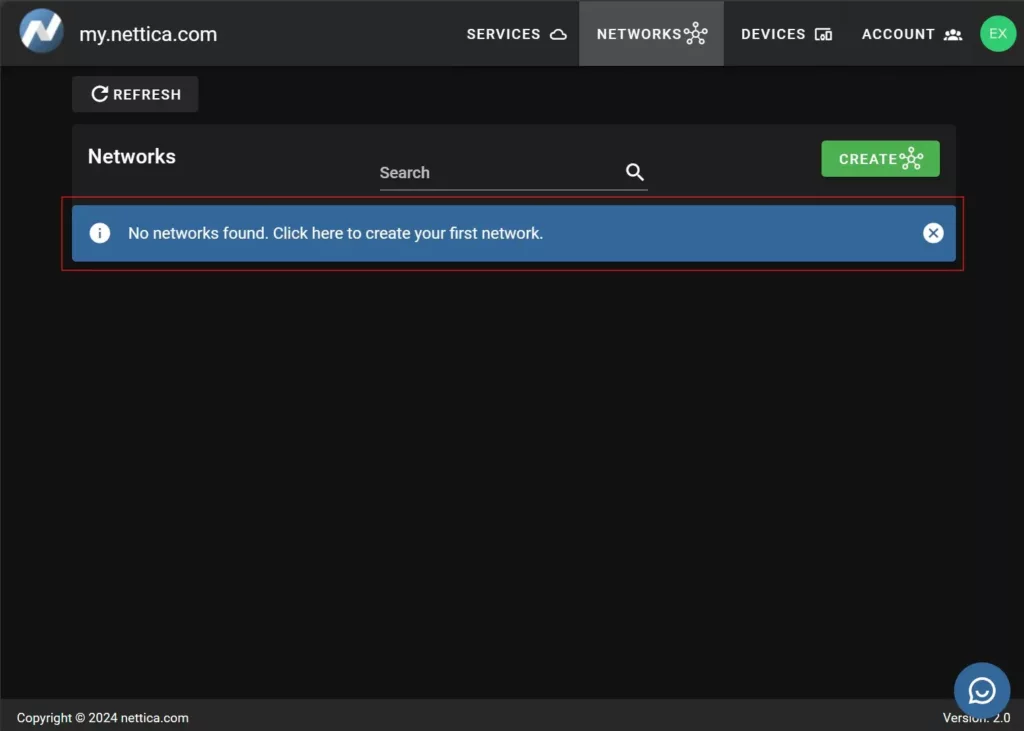
Click it.
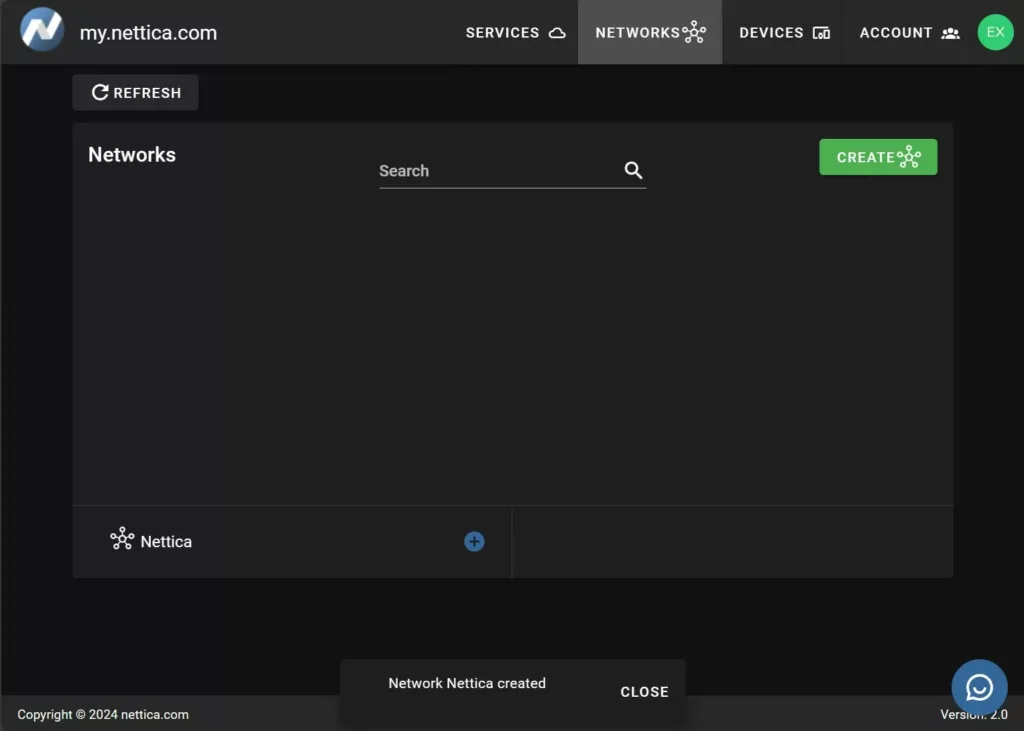
Configure Device
Well, that was easy! Now, let’s create a device for your laptop. Click on the Devices tab. You’ll see another blue banner. Click it.
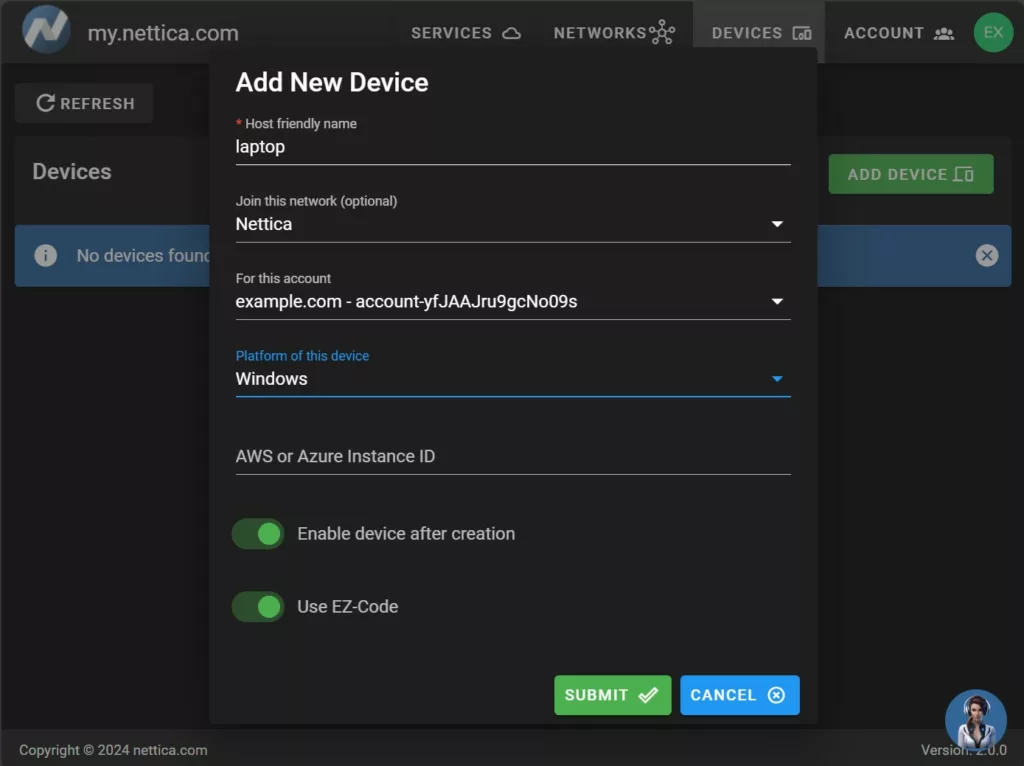
We chose “laptop” as the host-friendly name and joined the Nettica network we had just created. Finally, we selected Windows for the platform. Click Submit to add the device and join the network.
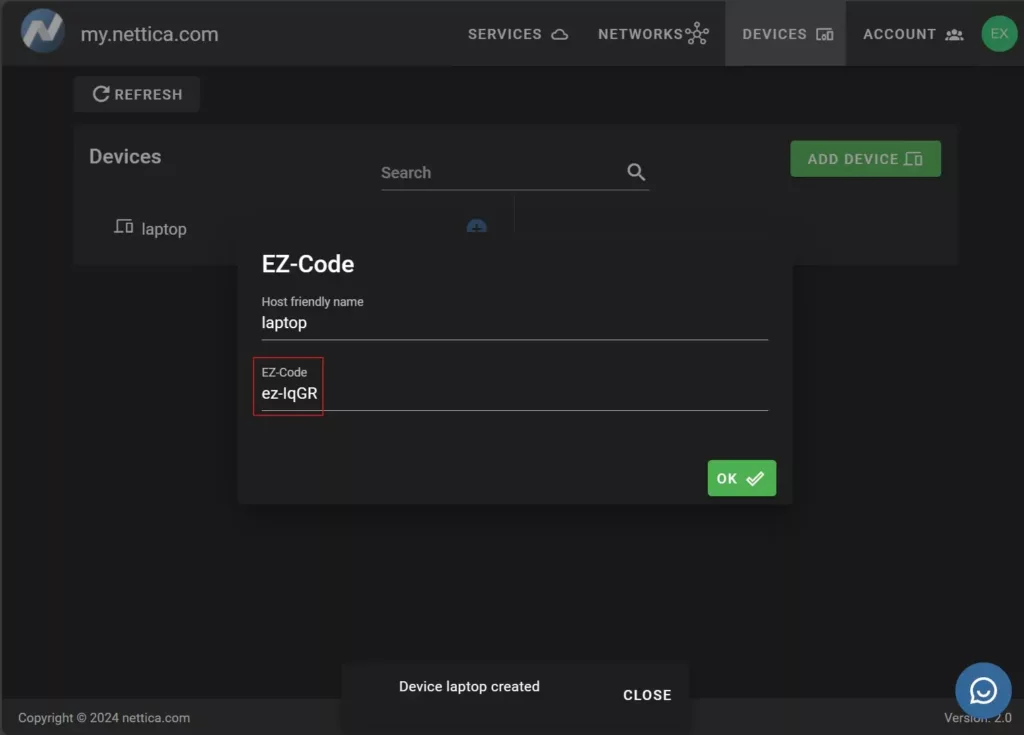
Configure Nettica Agent using EZ-Code
Next, return to the Nettica Agent you just installed and click “Settings” (the gear icon). Then, copy and paste the EZ-Code from the browser to the agent. Then click Submit. If you accidentally clicked away in your browser, then you can find your EZ-Code by clicking “laptop” and looking in the right-hand pane. It’s the first item. Note that EZ-Codes are for one-time use only.
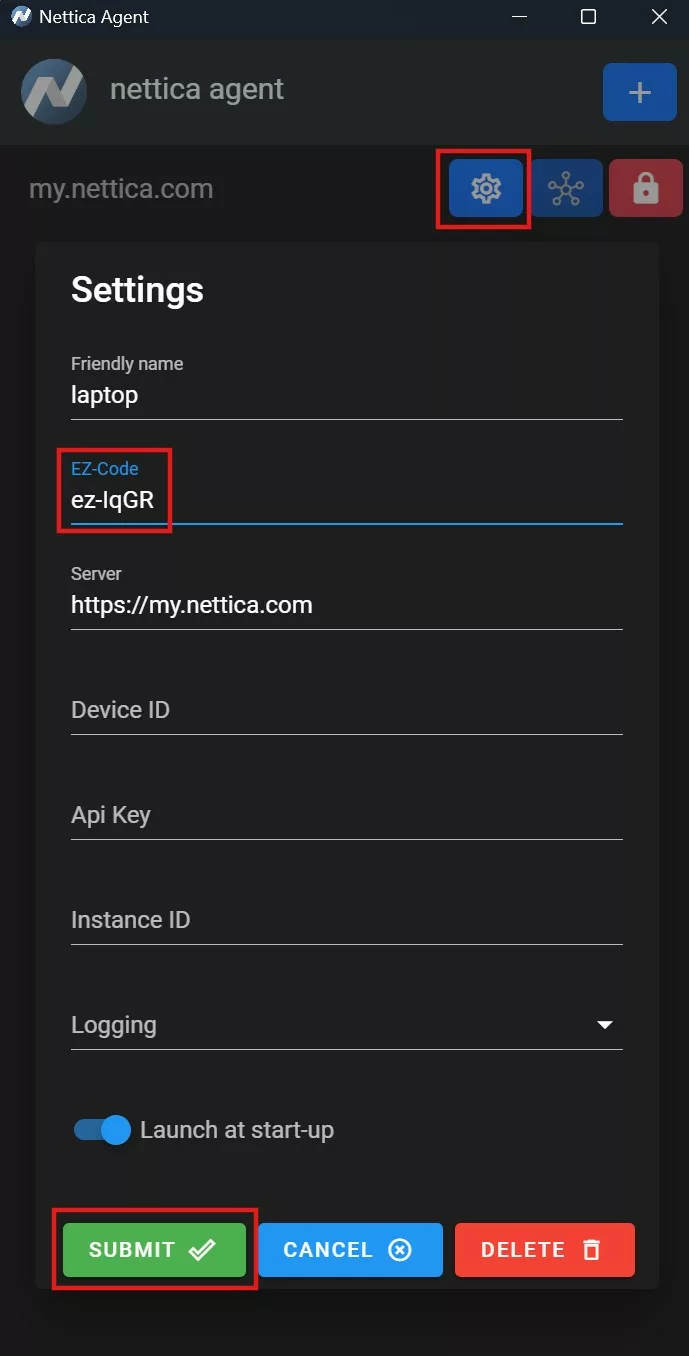
That’s it! The device is set up and joined to the Nettica network. It’s time to add the tunnel!
Configure Tunnel Service
Finally, let’s configure the tunnel service! Where do you want to go today? We have over 20 locations around the world to choose from. Let’s go to Amsterdam! Return to your browser, click the Services tab, and then Add Service.
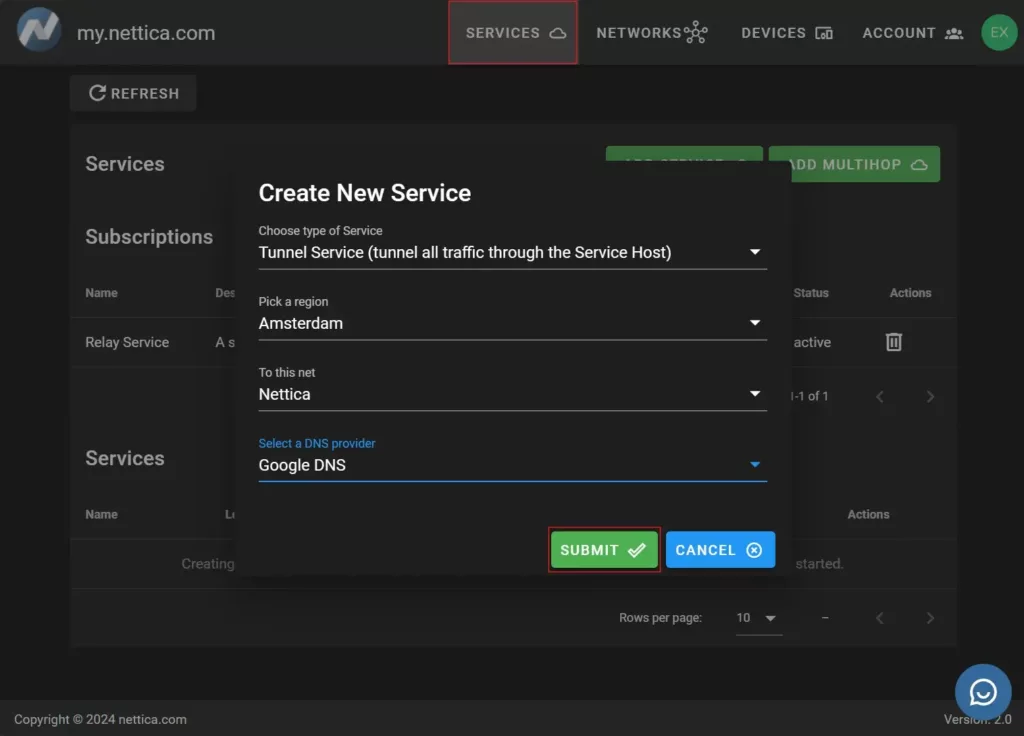
Choose “Tunnel Service” for the type of service and choose any region you’d like. For the network, pick the one we created, “Nettica,” and then choose a DNS provider. Click Submit.
After a few moments, you will receive notifications from the Nettica Agent that your network has been updated, and that your IP address has changed. And guess what? We’re now in Amsterdam! You may even receive a notification from Windows suggesting you change your timezone!
Important Note: Nettica’s VPNs are “always on”. If you want to turn it off, go to Nettica Agent and toggle it off.
Conclusion
Today, we learned the quickest way to set up a Nettica VPN, and we barely scratched the surface of the most powerful VPN service on the planet. If you run into any problems, then please do not hesitate to contact Nettica Support. That’s what we’re here for. You can also click the links below to find out what else is possible with Nettica.
Related Reading
Getting Familiar with the Nettica Admin
Discover How to Create a WireGuard VPN Using a Raspberry Pi
